Using Photoshop can sometimes seem like a necessary evil, especially when things seem to take much longer than they should. However, if something seems to take a long time, you can be pretty sure that someone has found a quick way of doing it!
So we are bringing you 10 quick tips that will hopefully speed up some of those tedious Photoshop tasks. All of these tips are image-related, as working with images is not necessarily the favorite thing for designers to spend a lot of time doing. These tips should help to speed up work on images whilst retaining quality.
Photoshop Quick tips
1. Layer Styles
When you double click on a layer in Photoshop, you are presented with the Layer Styles options (you can also get here by clicking the fx at the bottom of the layers palette).
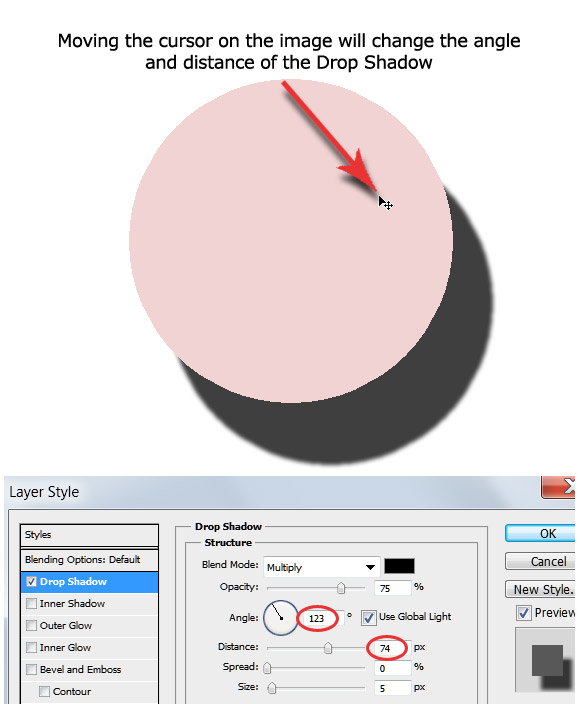
Four of these layer styles have a little secret that you may not be aware of: you can make adjustments directly on your canvas while the layer style window is active. The 4 styles in question are:
- Drop Shadow
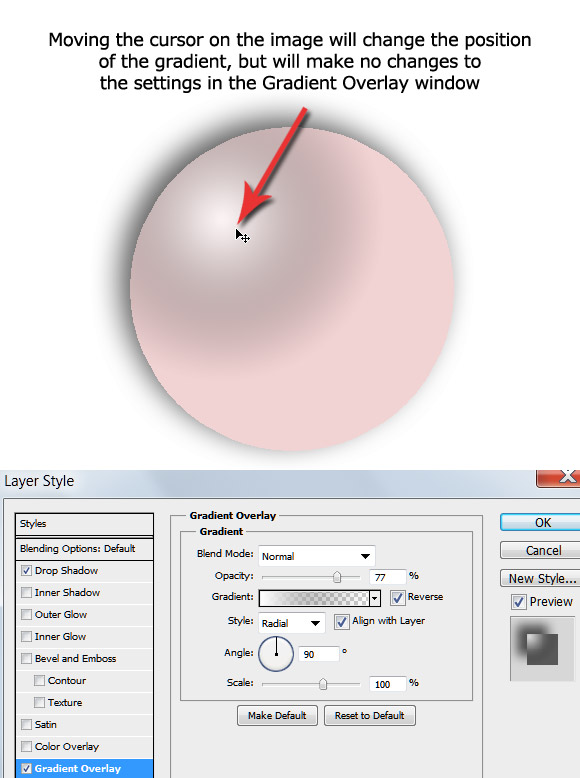
- Gradient Overlay
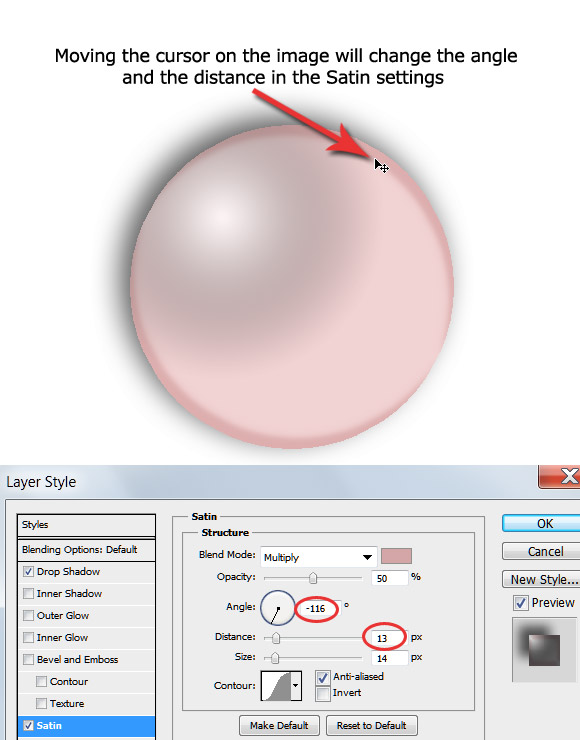
- Satin
- Pattern Overlay
The following 4 images show the adjustments that can be made directly on the image:
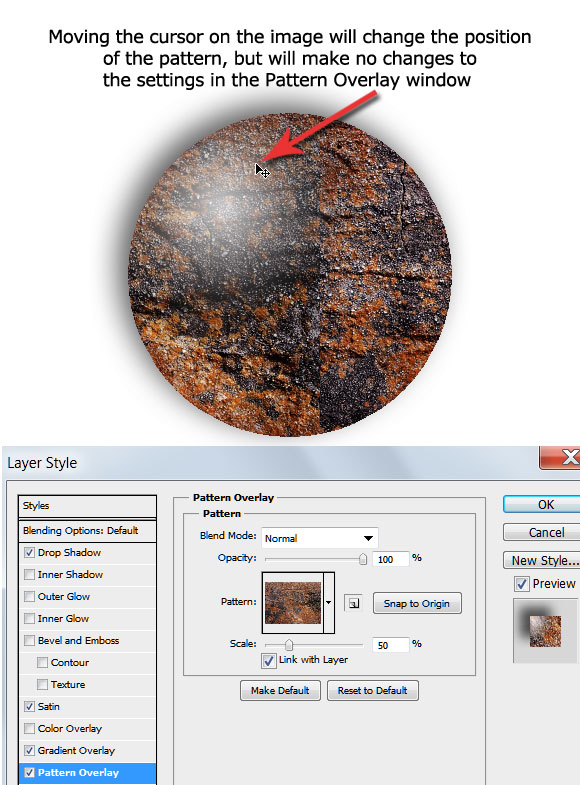
Extra Tip: You can also zoom in and out of your image whilst the Layer Style window is active using CTRL/= and CTRL/-
2. Re-size an ‘Empty’ Selection
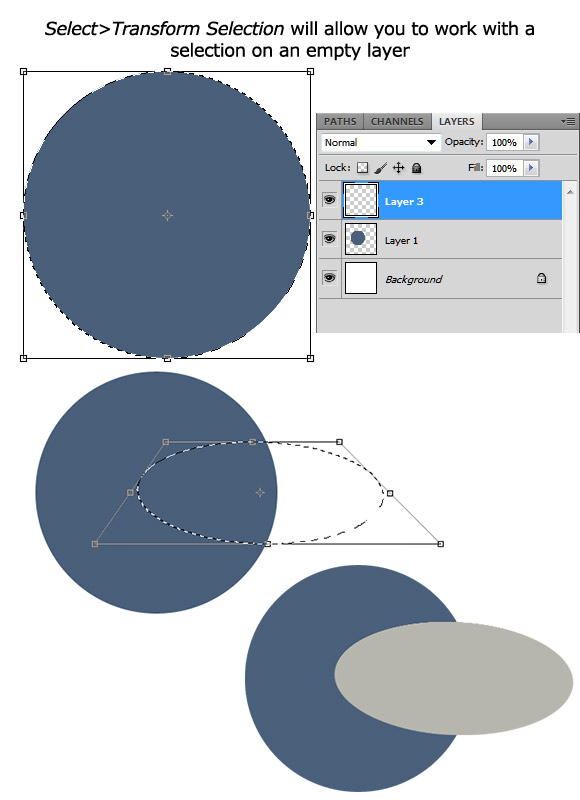
Sometimes you need to re-size an empty selection – Photoshop will tell you ‘Could not transform the selected pixels because the selected area is empty.’ There is a solution!
Make your selection, make your empty layer active, then Select>Transform Selection.
Now you can transform the selection using all the Transform methods such as Perspective, Warp, Skew, etc.
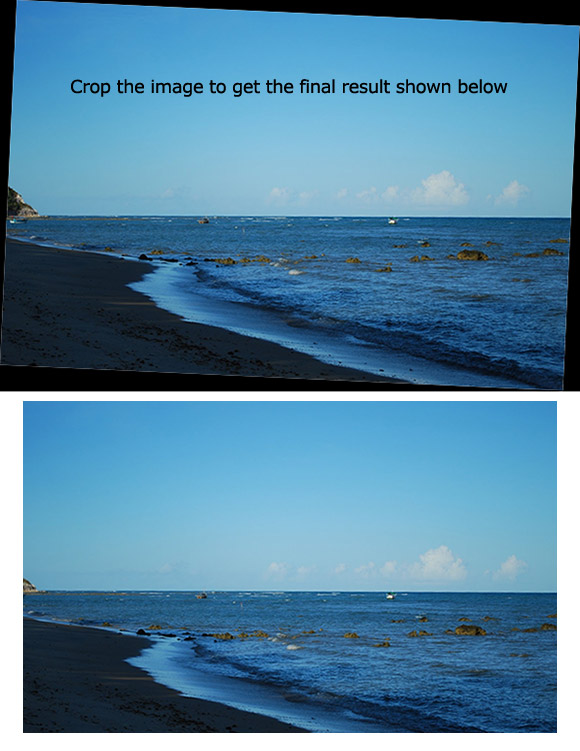
3. Level the Horizon
Sometimes images are not quite level, and in such cases Photoshop has the Image Rotation feature to straighten it.
There are two other methods that are more accurate and very easy. The first one is using the Ruler Tool and Image Rotation (this is the more accurate of the 2 methods) – follow the instructions on the images below:

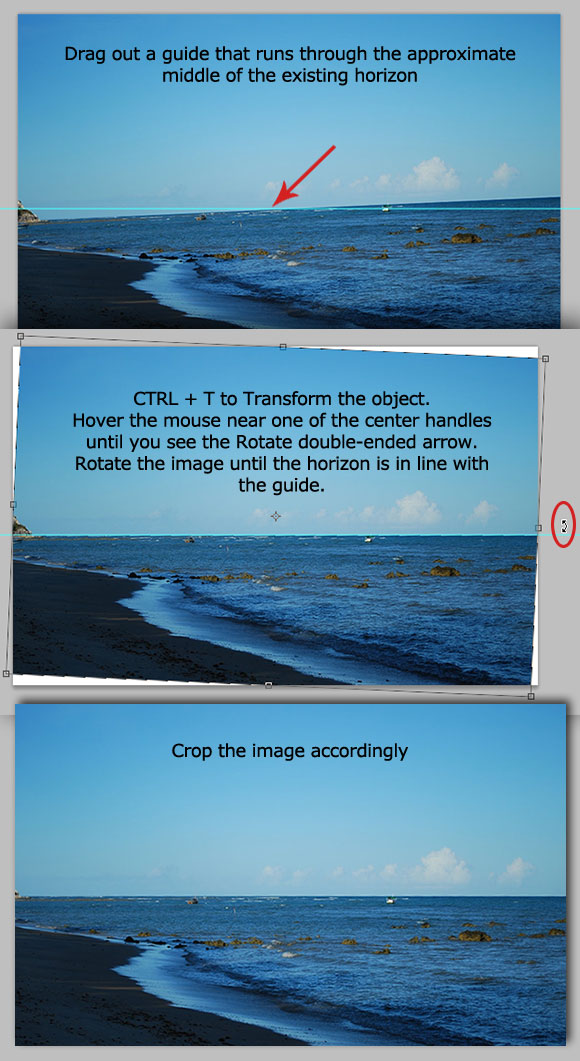
The second method uses the Transform Tool – follow the instructions shown on the image below:
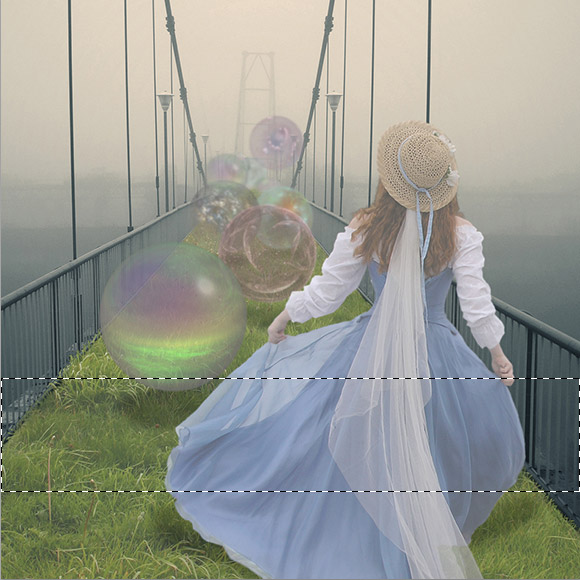
4. Create Lighter or Darker Panels on an Image
You will need to duplicate the background layer as this process is totally destructive on the image!
Working on the duplicate layer, create a selection on the image.
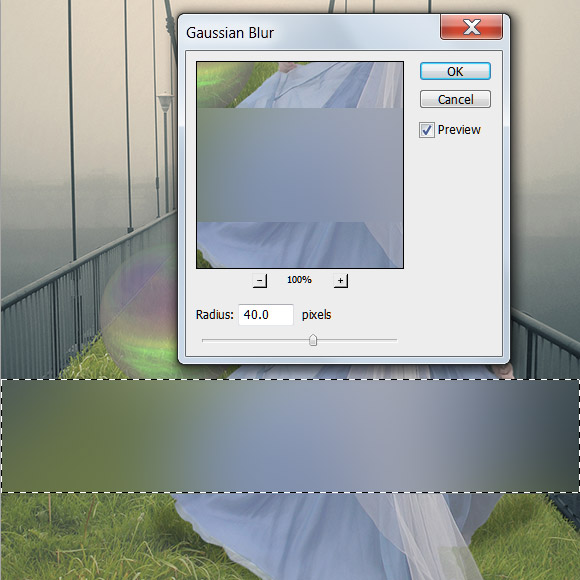
Blur>Gaussian Blur – set the radius to around 40px.
Edit>Fade Gaussian Blur – set the fade to around 75% (or whatever suits your image), and change the blending mode – depending on whether you want your panel to be lighter or darker than the image, many of the available modes will give a noticeable result, such as Screen, Overlay, Color Dodge, Exclusion, etc. Try the modes to see which works for your requirements.
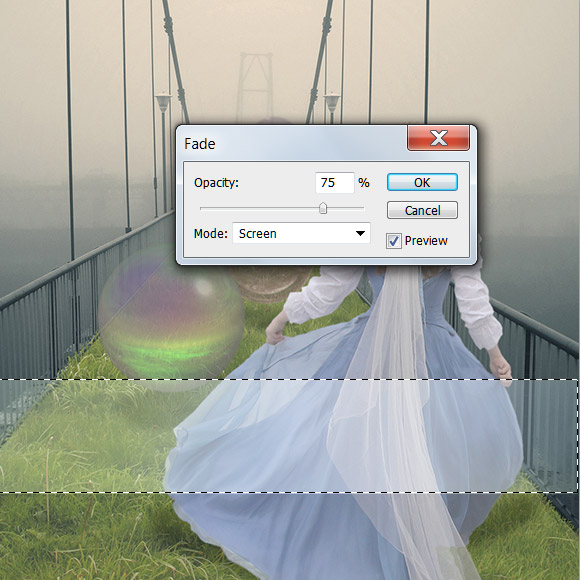
Note: You must use Edit>Fade Gaussian Blur immediately after applying the blur or it will no longer be available to use.
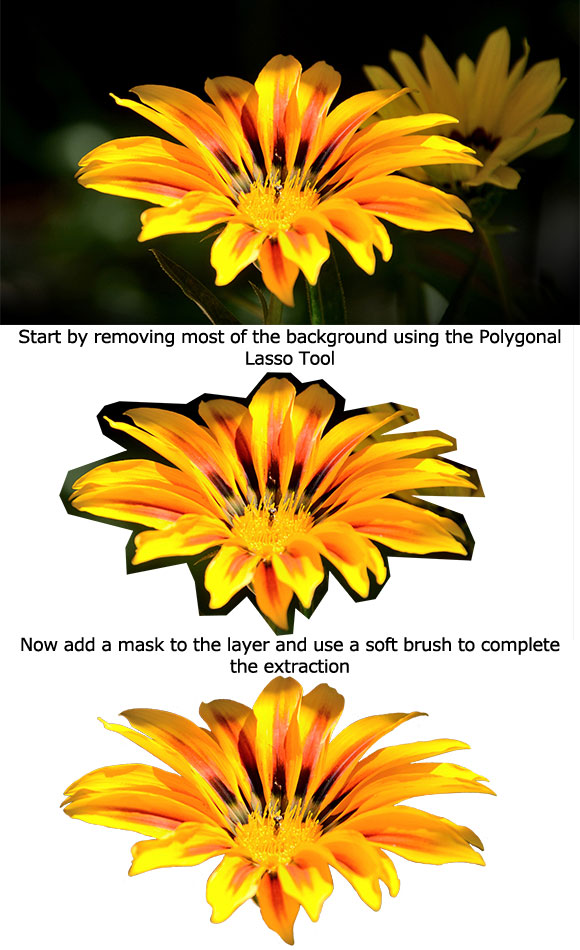
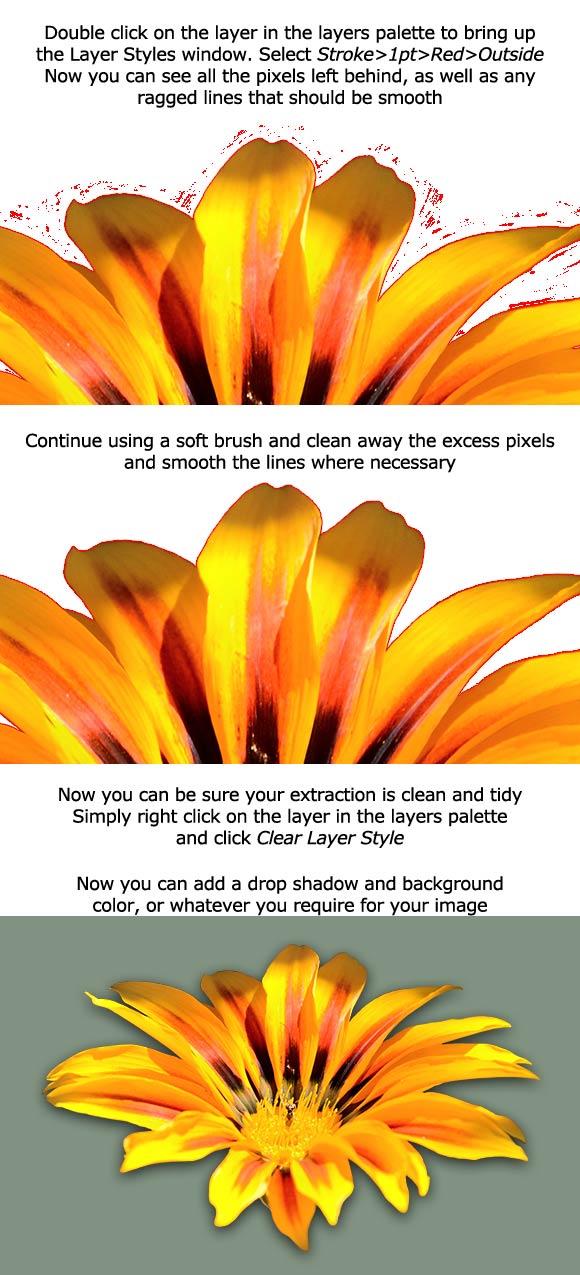
5. Clean Extraction
Although there are possibly some preferable methods of extraction than using a mask and the brush tool, when the edges of an object need to be soft and the extraction is quite fiddly, most of us will resort to using a mask and brush.
No matter how hard you try to make it a clean extraction, you will leave some pixels that could impair the end result of your work. This tip will show you how to ensure you have no left over pixels after extraction.
Follow the instructions on the images below:
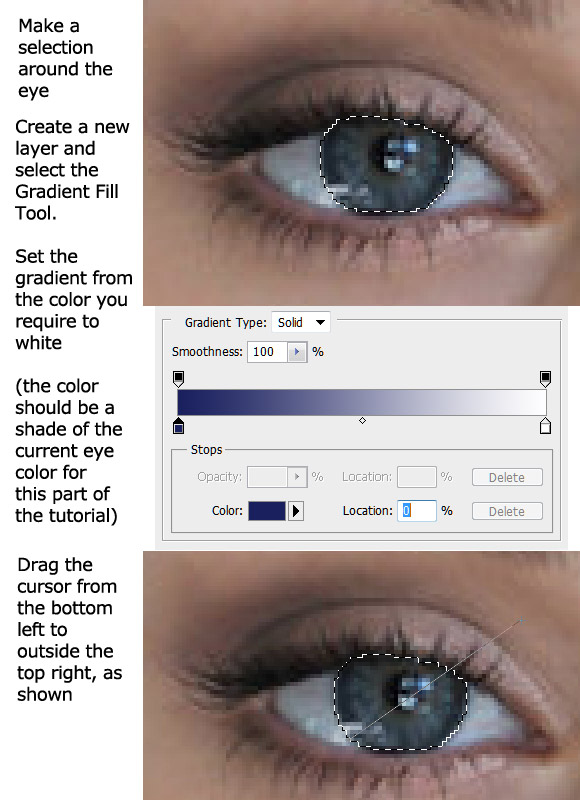
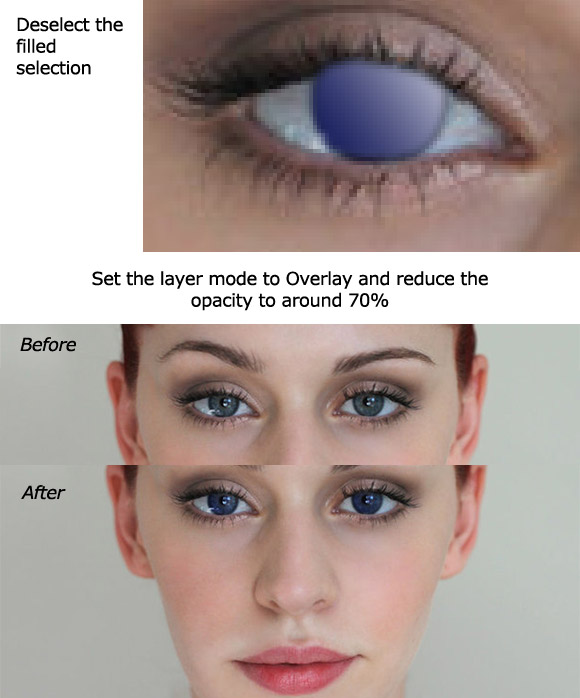
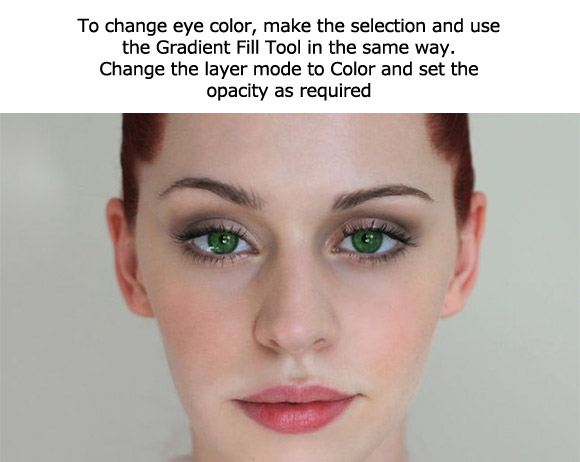
6. Change Eye Color
Changing eye color is not really too difficult using Photoshop’s built-in tools.
Follow the instructions on the image below:
7. Non-Destructive Lighting Effects
This is a way to add lighting effects from Photoshop’s Filter menu without affecting your original image.
Create a new layer above your image.
Edit>Fill – set to 50% Gray
Set layer mode to Overlay
Now you can render any lighting effects on this layer without destroying your original image.
Extra Tip: You can also use a 50% Gray layer set to Overlay to use the Dodge and Burn Tools non-destructively.
8. New View
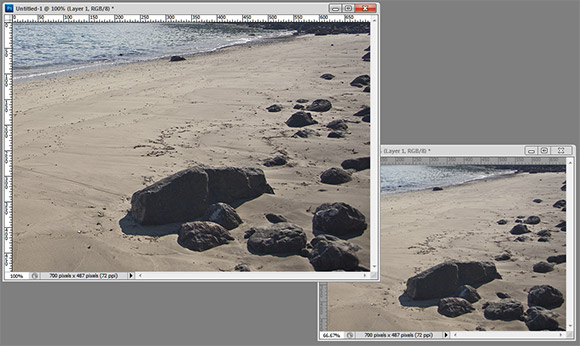
Sometimes when you are working on an image you have it zoomed in very large, but you need to keep returning to 100% view to see the effects of what you are doing. This is especially true when using such tools as the Clone Stamp Tool.
Window>Arrange>New Window for [document name]
You can now keep one window at 100% and zoom in and work on the other window and you can view the 100% window periodically as you work, which will change with the changes you are making on the zoomed image.
9. Make a Color Swatch from an Image
Open your image in Photoshop and duplicate it (Image>Duplicate).
We don’t really want thousands of colors in a swatch, so to reduce the number of colors, change the image mode: Image>Mode>Indexed, apply the following settings:

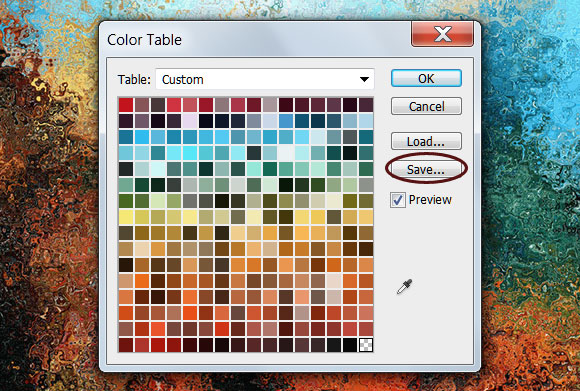
Image>Mode>Color Table – now you have the table of colors from your image. Click on Save and navigate to Photoshop>Presets>Color Swatches (or wherever you wish to save the swatch).
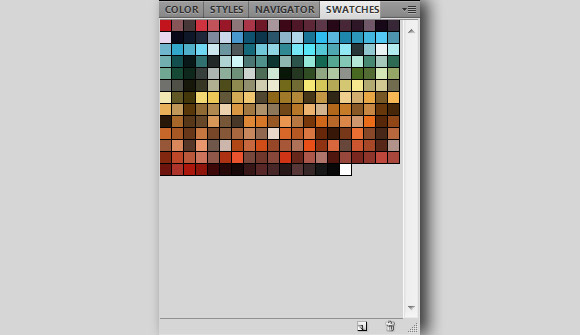
Now you can delete the image and work on the original RGB Mode image, and you can load the saved swatch into the swatches palette.
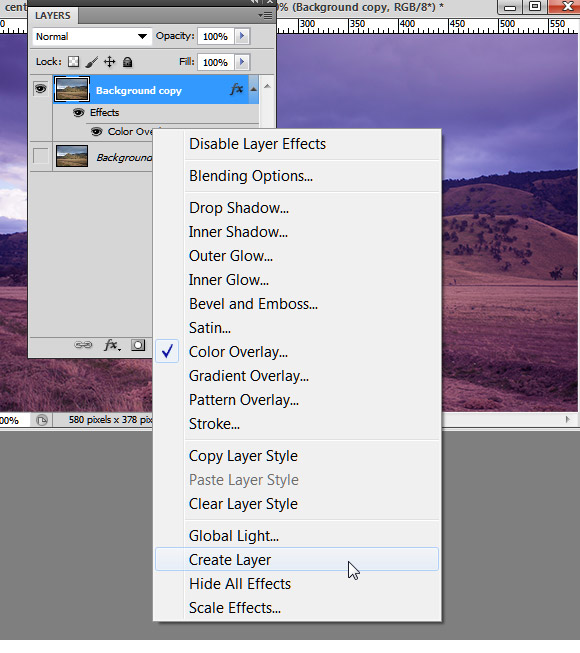
10. Create Layers from Layer Styles
When you add a layer style it is added to all of the layer, but sometimes you only want it to affect parts of the image.
You can turn your layer styles into layers as follows:
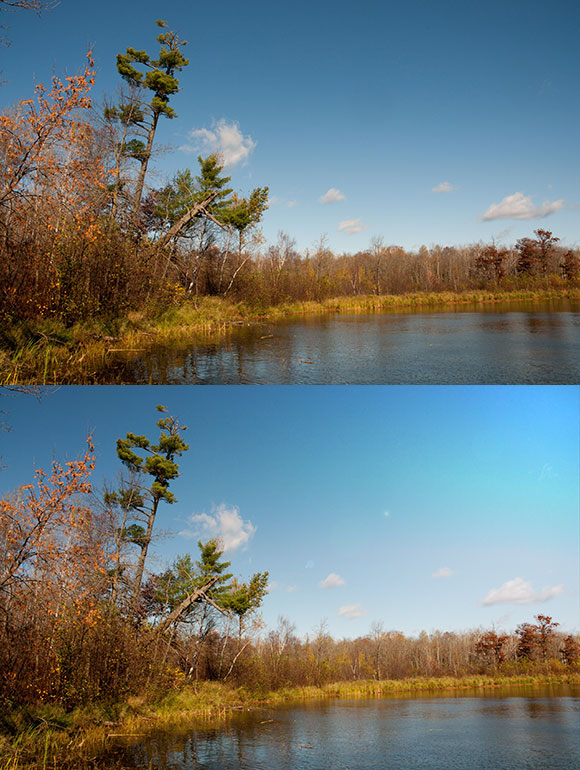
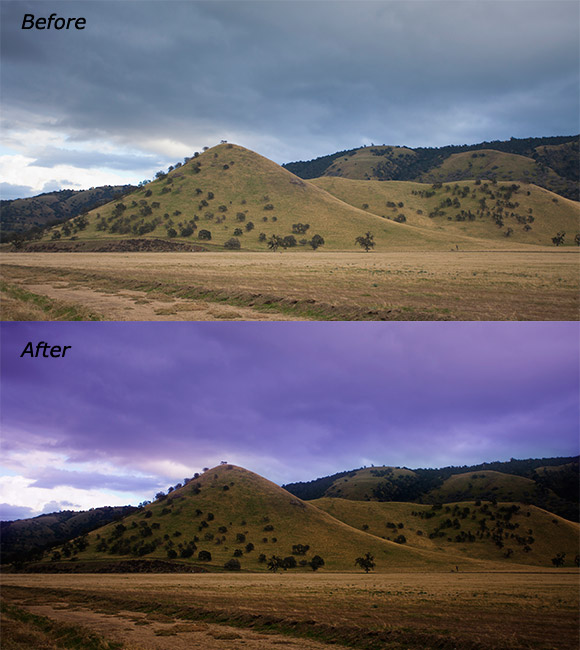
On my image I added a Color Overlay to make the sky more dramatic. I used #6B3FA7 and set the Blend Mode to Soft Light.
Now right click on the Color Overlay effect in the layers palette and click Create Layer.
Now you can either use the Erase tool or add a layer mask and use the Brush Tool to clear the style from everywhere but the sky.
Now I want the ground to be darker to fit better with the sky, so add another Color Overlay style to the image, using Black and Soft Light Blending Mode.
Right click on the Color Overlay effect in the layers palette and click Create Layer.
Again, either with a mask or with the Eraser Tool, clear the sky of the black overlay.
Now you can adjust the opacity of the layer to suit your image.
Conclusion
Hopefully you learned something helpful to you from these quick tips for Photoshop.
There are obviously many, many more tips and tricks that help improve, enhance and speed up Photoshop workflow – unfortunately, finding them takes time! On the bright side, however, in many cases other people have spent that time and have been good enough to share their discoveries with us.
Do you have any Photoshop quick tips you would like to share with us?
Please leave your comments and tips in the section below.